
DIY Guide to Installing 3 Prong Outlets
By Rachel Blevins | Published on 2023-01-03
Are you looking to upgrade your home with a new 3 prong outlet? Installing a 3 prong outlet is a great way to add convenience and safety to your home. This DIY guide will walk you through the process of understanding 3 prong outlets, the types available, safety considerations, tools needed, and a step-by-step guide to installing a 3 prong outlet. We'll also provide troubleshooting tips and alternatives to installing a 3 prong outlet. With this guide, you'll be able to confidently and safely install a 3 prong outlet in no time!
Understanding 3 Prong Outlets
A three prong outlet is an electrical outlet that has three slots for connecting electrical wires. It is also known as a grounded outlet because it has a ground wire that connects to the metal box that houses the outlet. This ground wire helps protect against electrical shock and other hazards. The three prong outlet is the most common type of outlet in the United States and is used for most household appliances and electronics.
The three prong outlet is designed to provide a safe and reliable connection for electrical devices. It consists of two vertical slots and one round hole. The two vertical slots are for the hot and neutral wires, while the round hole is for the ground wire. The ground wire helps protect against electrical shock and other hazards by providing a path for electricity to flow to the ground in the event of a short circuit. The ground wire also helps reduce the risk of fires caused by faulty wiring.
The three prong outlet is also designed to provide a secure connection for the electrical device. The two vertical slots are designed to fit the two prongs of the plug, while the round hole is designed to fit the ground prong. This ensures that the plug is securely connected to the outlet and that the electrical device is properly grounded. This helps to reduce the risk of electrical shock and other hazards.
Types of 3 Prong Outlets
When it comes to 3 prong outlets, there are a few different types to consider. The most common type is the standard 3 prong outlet, which is the type you’ll find in most homes. This type of outlet has three holes, two of which are for the hot and neutral wires, and the third is for the ground wire. This type of outlet is usually found in kitchens, bathrooms, and other areas where you may need to plug in an appliance.
Another type of 3 prong outlet is the GFCI outlet. This type of outlet is designed to protect against electrical shock by detecting any current leakage and cutting off the power. It is typically found in areas where there is a risk of water coming into contact with electrical outlets, such as bathrooms and kitchens.
The last type of 3 prong outlet is the polarized outlet. This type of outlet is designed to ensure that the hot and neutral wires are connected correctly. It has two slots, one of which is wider than the other, and the hot wire is connected to the wider slot. This type of outlet is typically found in areas where there is a risk of electric shock, such as outdoor areas.
Safety Considerations for Installing 3 Prong Outlets
When it comes to installing 3 prong outlets, safety should be your top priority. Before you begin any electrical work, it is important to turn off the power at the breaker box and test the wires with a voltage tester to make sure they are not live. Additionally, you should always wear protective gear such as safety glasses and gloves when working with electricity.
It is also important to make sure that the outlet you are installing is rated for the voltage of your home. If you are installing a 3 prong outlet without ground, make sure that it is rated for the voltage of your home and that it is properly installed. Additionally, you should never use a 3 prong outlet without ground in a wet area, as it can be a fire hazard.
Finally, you should always double check your work before turning the power back on. Make sure that all of the wires are connected properly and that the outlet is securely mounted. Additionally, you should test the outlet with a voltage tester to make sure that it is working properly. Following these safety considerations will help ensure that your 3 prong outlet is installed correctly and safely.
Tools Needed for Installing 3 Prong Outlets
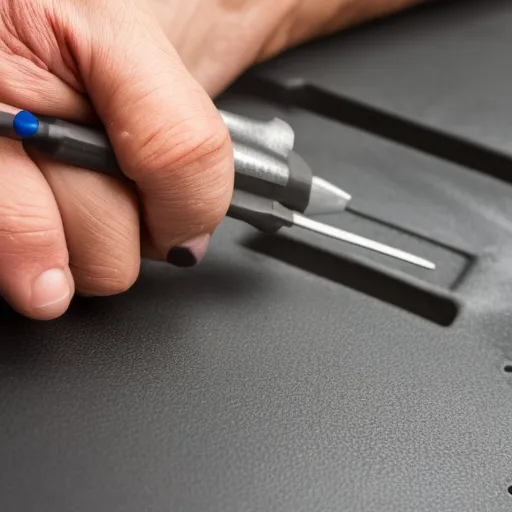
Installing 3 prong outlets requires a few essential tools, so it’s important to make sure you have everything you need before you start. The most important tool is a voltage tester, which you can use to make sure that the power is off before you start working. You’ll also need a flathead and Phillips screwdriver, a pair of wire strippers, a pair of needle-nose pliers, and a drill with a bit that’s the same size as the outlet’s mounting screws. If you’re replacing an existing outlet, you’ll also need a voltage tester to make sure the power is off before you start. Finally, you’ll need a 3 prong outlet, which you can buy at any home improvement store.
When it comes to safety, it’s important to make sure you have the right tools for the job. If you’re unsure of what tools you need, it’s best to consult an electrician or a knowledgeable friend or family member. Additionally, make sure you’re wearing protective gear such as safety glasses, gloves, and a dust mask while you’re working. With the right tools and safety precautions, you’ll be ready to install your 3 prong outlet.
Step-by-Step Guide to Installing a 3 Prong Outlet
Installing a 3 prong outlet is a relatively simple process, but it’s important to take the necessary safety precautions before beginning. First, make sure to turn off the power to the circuit you’ll be working on. Then, remove the faceplate from the existing outlet and unscrew the outlet from the wall.
Next, you’ll need to connect the wires to the new outlet. Start by connecting the black wire to the brass terminal, the white wire to the silver terminal, and the green or bare copper wire to the green terminal. Make sure to wrap the wire around the terminal in a clockwise direction and secure it with a wire nut.
Finally, you’ll need to secure the outlet to the wall. Place the outlet into the wall box and secure it with the screws provided. Then, replace the faceplate and turn the power back on. Test the outlet to make sure it’s properly installed and functioning. If everything is working properly, you’ve successfully installed a 3 prong outlet.
Troubleshooting Tips for Installing a 3 Prong Outlet
Troubleshooting a 3 prong outlet installation can be a tricky process. If you’re having trouble getting your outlet to work properly, there are a few things you can do to troubleshoot the issue. First, make sure that all the wires are connected properly. If the wires are not connected correctly, the outlet will not work. If the wires are connected correctly, make sure that the outlet is properly grounded. If the outlet is not grounded, it will not work properly.
If the outlet is still not working, you may need to check the circuit breaker. If the circuit breaker has tripped, you will need to reset it. If the circuit breaker is not the issue, you may need to check the wiring in the wall. If the wiring is faulty, you may need to replace it.
Finally, if all else fails, you may need to replace the outlet itself. If the outlet is damaged or worn out, it may not be able to handle the current. Replacing the outlet is a relatively simple process, but it is best to consult a professional if you are unsure.
Alternatives to Installing a 3 Prong Outlet
When it comes to alternatives to installing a 3 prong outlet, there are a few options to consider. The first is to use a two-prong outlet with a ground fault circuit interrupter (GFCI). This is a device that monitors the flow of electricity and will shut off the power if it detects an imbalance. This is a great option for areas where there is a risk of water or moisture, as it will help to protect against electric shock. Another option is to use a three-prong adapter. This is a device that plugs into a two-prong outlet and adds a third prong for grounding. This is a great option for older homes that don’t have a three-prong outlet installed. Finally, you can also use a power strip with a built-in surge protector. This is a great option for areas where you need multiple outlets, as it will provide additional protection against power surges.
No matter which option you choose, it’s important to make sure that you follow all safety guidelines and instructions when installing the outlet or adapter. Make sure that you read the instructions carefully and double-check your work before turning the power back on. This will help to ensure that your outlet is properly installed and that you and your family are safe.
Conclusion
In conclusion, installing a 3 prong outlet is a relatively simple DIY project that can be completed with the right tools and safety considerations. With the right preparation and knowledge, you can easily install a 3 prong outlet in your home. It’s important to note that 3 prong outlets without ground are not up to code, so if you’re replacing an old outlet, make sure to check the wiring and replace it with a grounded 3 prong outlet. If you’re not comfortable with the wiring, it’s best to hire a professional electrician to do the job for you. With the right knowledge and preparation, you can easily install a 3 prong outlet in your home.
Conclusion
In conclusion, installing a 3 prong outlet is a relatively simple DIY project that can be completed with the right tools and safety considerations. With a step-by-step guide, troubleshooting tips, and alternatives to installing a 3 prong outlet, you can easily upgrade your home’s electrical outlets and ensure your safety.